1991 Volvo 240 Wagon Automatic Transmission Wiring

During the process of trying to get the starter motor out of our 1991 Volvo 240 Wagon, we managed to break the seal that attached, to the top of the transmission, an electrical wiring harness coming from the gearshift lever.

Today, after putting everything back together except for that wiring harness, we found out what that wiring harness does.  At highway speeds (e.g., 60 mph or above) the car is in high gear with, presumably, the torque converter locked up.  A button on the side of the shift lever would, when pressed, make an orange arrow appear in the instrument cluster, and cause the engine rpm to increase as if the torque converter has stopped locking up (which is probably the entire purpose of the button).

Now that the cable is not longer attached to the transmission, the button just lights up the arrow. It doesn’t cause the engine rpm to increase. Probably it no longer telling the torque converter “don’t lock up.”

Aside from that, the transmission seems to be working perfectly.

Advertisement

1991 Volvo 240 Wagon Automatic Transmission Service

My tech did an automatic transmission service on our 1991 Volvo 245 today. By the looks of the pan gasket she’s of the opinion that the car might well never had have had its pan gasket changed, and perhaps not the filter, and perhaps not the fluid either.

She cleaned the bottom of the transmission somewhat, and put a large drain pan underneath the car.  She removed the 14mm drain plug and drained most of the fluid. She removed the 18mm lower starter motor bolt that was holding the dipstick tube in position, and undid the 24mm nut holding the dipstick tube against the transmission pan.

She removed fourteen 10mm pan bolts, and the five 8mm bolts that held the filter on. Fair warning: removing the filter (more a strainer, really) caused another deluge of fluid – sideways to some extent.  Next time we’ll take a knife and poke a hole in the filter, since we’re replacing it anyway. That way the fluid drains more predictably.

She inspected the magnets and saw much sludge, and some metal slivers (perhaps ¾” long). She cleaned the pan and magnet.  Brake cleaner works well.

She installed the new filter. Due to its shape it’s impossible to install it the wrong way.

The pan gasket was not flat, so she first re-inserted the pan bolts into the gasket and pan, so as to hold the gasket in place. The smaller size of the bolt holes in the gasket make this viable. She moved the pan-and-bolts-and-gasket assembly into position and started threading and then gently torquing the bolts.

She reattached the dipstick and starter motor bolts, and poured about ¾ of a gallon’s worth of Dexron/Mercon down the dipstick — what the manual recommends, and also approximately as much as had come out when draining.

We went for a test drive – perfect behavior.

After that, with the engine and transmission at operating temperature, she stopped the car, moved the shifter through its various positions, waited two minutes, and with the engine running, checked the fluid level again, topping up as needed.

Success!

ATF for Volvo 240

The automatic transmission fluid was low on my 1991 Volvo 240 Wagon, and I should find out why. Regardless of the cause, I needed to top it up.

I did so with the engine running and warm, and after shifting into each gear for a few seconds. I used the tube with the yellow-handle dipstick near the firewall, and tested the level again. Yep, too low.

Into the tube, I inserted a small funnel that I’d bought for this reason. I made sure that the funnel was clean, and I avoided cleaning it with cloth that might leave lint that might contaminate the transmission oil. I wasn’t too happy about my chances of not spilling so into that small funnel I put a larger funnel, and into that I poured the fresh automatic transmission fluid.

I would prefer to read the official Volvo opinion as to what type of ATF I should use, and I don’t recall reading that recently or at all, so hearsay and common sense are my fall-backs. On those premises, I used Dexron/Mercon III.

It’s easy to overfill, so it’s good to pour in some fluid, check the level, then pour some more. It’s easy to pour more in a royal pain to take some out if you’ve overfilled the transmission.

Volvo 245 Tailgates over the Years

I own a Volvo 1973 145, and a 1991 245. It’s interesting to me how little the tailgate has changed (which to me means: has needed to change) over the years.

A big modernizing-look style change occurred when the shapely chrome handle such as on my 145 was replaced by a square, matt black handle such as on my 245.

I recently analyzed a 1983 245, and discovered that its shapely chrome tailgate handle looks the same as on my 1973 145.

The tailgate hinges, on the other hand, were still chrome until at least 1991, and quite possibly after that too. I have yet to analyze a 1993 car, to make sure.

The tailgate struts and attachment parts seem to be identical through 1991.

The lock and wiper mechanisms, however, are different on the 1983 vs. 1991 cars.

The 1983 car has its washer fluid nozzle on the side of the body; the 1989 and 1991 cars that I analyzed has them at the top center, with a hose running along the top of the tailgate lip to feed the fluid to the nozzle.


Torx vs. Not on 240 Series Volvos

I have analyzed enough 240 Series Volvos to conclude that there is a trend, in later years, to use Torx fasteners. There is an interesting write-up on Torx, on Wikipedia.

On my 1991 245, the tailgate attaches to the hinges with Torx T40 fasteners, but on a 1990 car that I analyzed, 12mm hex bolts were used instead.

It’s not as if any one year was the magic cut-over year to start using Torx. On a 1990 model that I analyzed, the side panels to the front center console were attached with Torx screws, whereas on an 1983 model, Philips screws were used instead.


Tailgate Strut Clips for a Volvo 245 (240 Wagon)

I almost feel silly offering for sale something as tiny as a tailgate strut clip, but one of the tailgates I removed from a junkyard Volvo 245 had a twisted wire instead of a clip, so … it seems people do need these clips. If there’s demand, I’m happy to supply.

This little clip reminds me of the poem (from Wikipedia)

For want of a nail the shoe was lost.
For want of a shoe the horse was lost.
For want of a horse the rider was lost.
For want of a rider the message was lost.
For want of a message the battle was lost.
For want of a battle the kingdom was lost.
And all for the want of a horseshoe nail.

Without getting carried away, it’s not hard to imagine the scenario where someone is bending over under an open tailgate right when the strut slips off the rod for want of a clip to secure it in place. A sharp metal edge on something weighing just short of 100 pounds, coming down hard and rapidly onto someone’s lower back … not a good thing.

New vs. Used Tailgate Struts for a Volvo 240 Series (245, Volvo wagon)

I drive a 1991 Volvo 245 (240 wagon). The tailgate struts on my own car needed replacement, and this seemed to be the type of part that one would want to buy new, not used — especially since I could get new replacement units for less than $11 each. I was so convinced that this is a part to always buy new that I wrote a mini-article explaining why I don’t offer good, tested, guaranteed used tailgate struts for sale.

Well, after last night, I changed my mind. I DO offer used tailgate struts for sale.

In no way am I disrespecting the vendor from whom I bought these parts. They’re nice people, and they specialize in Volvo parts. Their website was easy to use, and the parts arrived quickly and in good condition.

The sticker on the new parts announced that they were made in Taiwan. For me, that’s a positive. Yay for Taiwan! I prefer to buy items that were not made in Communist China. So far, so good.

The parts did not automatically come with the little hip joint on the car side, or the slide clip for attachment on the tailgate side. No problem. My car has its own clips and hip joints anyway.

The specs on the new parts showed a length of 470 mm, and a force of 700N (Newton). I Googled that and learned that this means: 157 pounds. With the two combined, that’s 314 pounds of lifting force. That seems like a lot to me. I can’t imagine a tailgate weighing that much.

The specs on the Meyle brand, made-in-Germany used tailgate struts that I removed from my car showed “as per Volvo 1 254 916″ and a force of 400N (90 pounds). So, the used struts, when they were new, provided 400N x 2 = 800N (180 pounds) of lifting force, combined. That seems a lot more realistic.

The used tailgate struts showed a production date stamp of 1998. So, this being a 1991 car, I can conclude that the original Volvo parts lasted for seven years, and the Meyle ones lasted for 17 years, since 1998 … this being 2015. Arguably, one of the Meyle used tailgate struts is still lasting … it seems to be in good working order. The other one was completely devoid of pressure.

Even with one new part installed, the tailgate stayed open by itself for the first time since I’ve owned the car. That’s good. And, although it was a little noisy when the tailgate opened and closed, the new part was able to hold the entire tailgate up solo. Problem is, even if the used one were still generating 400N of lifting force, then one strut would be at 700N and the other at 400N, so the former would be doing more work and presumably would wear out faster. For that reason, I initially decided not to mix the old and new parts, with one on each side.

I installed the second new tailgate strut too. Would the tailgate be too hard to close?

Yes! Wow. For me, it was very hard to pull the tailgate down. Granted, I’m female, so I’m not as muscular as a guy, but I’m also tall and athletic. My mom, who’s 5’2” and neither young nor athletic, would probably find this tailgate impossibly difficult to close.

The bigger-is-better premise such as applied to tailgate struts lifting force is hardly a good idea. Hair driers used to have a similarly irrational one-upmanship. Over the years, I have watched their advertised wattage numbers keep increasing. Presumably the clueless buying public concluded that hey, a 1200-watt hair drier must be better than a 1100-watt unit, so buy the former without even understanding what the concept even means.

Why, perhaps I could help natural selection along and offer to folks with that mindset a 100,000-watt hair drier and wow wouldn’t that dry their hair even faster? No doubt. It probably would also instantly incinerate the hair and probably much of the person holding the hair drier and part of the bathroom besides.  Applying this flawed premise to tailgate struts isn’t a good idea either, it turns out.

After trying to close the tailgate a few times, I decided I dislike the effects of the extra force enough to mix the old and new parts, with one on each side.

I put back the better one of the two used tailgate struts, and I’m keeping the other new part on the shelf for future use. So now my tailgate closes as easily as I’d like it to do, with one new tailgate strut and one 17-year old one.

This exercise really was a stark personal validation of the value I try to add with my little Volvo used-parts business. Even to me, it seemed counter-intuitive to put a used tailgate strut on my beloved Volvo, as a replacement — when I could by a brand-new one for less than $11. And yet, now that I have more-detailed information, I can see how buying a good, tested, guaranteed used tailgate strut can make perfect sense.

Tailgate Strut Lifting Force Tested on a Volvo 240 Series (245, Volvo wagon)

For the 245 tailgate struts, the official Volvo spec, as far as we know, calls for a lifting force of 400 Newton (about 90 pounds of lifting force) per strut, total for both: 800 Newton (about 180 pounds).

We did a little test and found that 700 Newton (about 157 pounds) is enough to keep a 245 tailgate up very sturdily, so even with 350 Newton (about 78 pounds of lifting force) a used one would still be fine. We plan to do some more testing to find the exact tipping point at which the tailgate barely doesn’t stay up any more. That way we can make sure we use a logical cut-off point as to the quality of the tested, guaranteed used tailgate struts we offer.

This test was performed on a 1991 car, which also has the third brake-light, automatic lock … pretty much everything we can imagine a stock 245 having.

Tailgate Strut Replacement on my 1991 Volvo 245

From the first day that I owned my 1991 Volvo 245 (240 wagon), the struts have been sagging, unable to keep the tailgate up. Until last night, I used a garden hoe handle to prop the tailgate open — not very elegant.

I figured that it makes sense to buy tailgate struts new, priced at less than $11 each. I ended up regretting that purchase, for reasons that I explain here. For those same reasons, I do offer good, tested, guaranteed used Volvo 245 tailgate struts for sale.

The replacement struts did not automatically come with the little hip joint on the car side, or the slide clip for attachment on the tailgate side. I do sell those too.

I opened and propped up the tailgate, using the stick I’ve been using all along to hold it open.

On the tailgate side of the strut, I used a flat screwdriver to remove the clips. It occurred to me that putting on safety glasses might be prudent.

Then, I pried the bottom part of the strut off the rod that’s part of the tailgate. It was tempting to pry or hit the body of strut; but that might have damaged it, so I applied the sideways force to just the bottom part of the strut, the part that slides onto the rod.

After that, I twisted the strut so that it threaded off the hip joint on the car side of the strut.

Even if the replacement part had come with its own hip joint, I might still have left my old one on the car, because removing the strut from the hip joint is much easier than removing the hip joint from the car.

It was as simple as that.

To reinstall, I threaded the replacement strut back into the hip joint, pushed the strut onto the rod on the tailgate, and pushed the clip back on.

Volvo 240 Heater Valve – Technical Analysis

This article discusses the Volvo 240 heater valve (a.k.a. heater control valve), for the Volvo 240 Series (Volvo Turbo, 242, 244, 245) through 1991. “Ranco Type H” is engraved on each of the three examples I analyzed. And yes, we do sell guaranteed used units.

The information herein is based on my 1991 car and used parts that I’ve bought from various junkyards. I haven’t verified this personally, but several forums and websites indicate that 1992 and 1993 cars use a different style heater valve. Several of them also mention that this part is no longer available from Volvo.

At least two vendors offer a non-original alternative, but as far as I can tell, one of these requires custom hoses and the other required some sawing or grinding. Nothing wrong with that, but some folks really want to keep their Volvos original.

Napa offers a rebuild kit too, for less than $10.

IMAG11822015-11-11 21.08.17
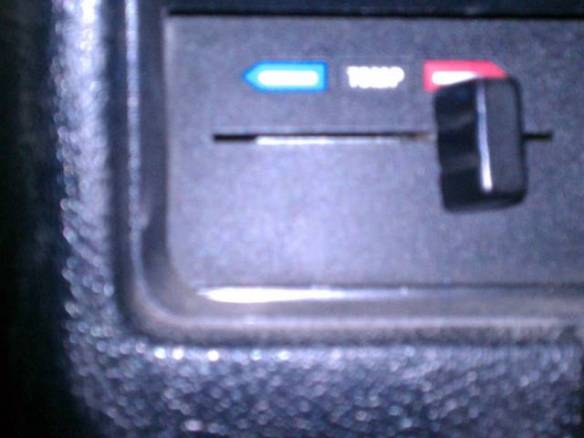
On Volvo 240 cars, the control to turn the heater on or off, or somewhere in between, is a simple left-to-right slide on the center console control panel, with some blue paint towards the left and some red paint towards the right — nice and simple.

IMAG5776By contrast, my contemporary BMW 6-series is a much-more-cool car — literally. It comes with a thermostatically controlled heater mechanism. This failed many years ago, and so now to turn the heater on, I have to open the hood and unplug an electrical wire from the heater valve unit. To turn the heater off, I have to open the hood and plug the electrical wire back into the heater valve unit. As the years go by, I more and more wish my BMW were more like my Volvo 240 is. (Yes, those are Volvo seats in the BMW. I transpanted them … another example of what I mean).

However, there IS a problem with my 1991 Volvo 240 Wagon. Its heater is ALWAYS on, regardless of the position of the heater control lever. Being a Volvo, it has a very, very good heater. I live in the Nevada desert, and I owned & drove the car all summer long. I became a not-so-big fan of the heater always being on. I just tested the output today. Even with the outside air being in the 30s (and yes, I mean Fahrenheit, since it’s now November here) it was putting out toasty-warm air into the cabin: 120 degrees.

2015-11-11 21.07.04

I’ve been methodically analyzing this part. I’ve bought three used heater valves off various junkyard Volvo 240 cars. I then hooked them to a test mechanism that I contrived, and concluded that one valve worked fine, one didn’t work and one was sort of in the middle.

The test basically exposed the inlet side of the heater valve to a stream of high-pressure water, and if I could still manually close the valve by actuating its lever, the valve was working correctly — otherwise not.

The complete heater valve unit with the cable, sleeve and a water hose attached

The complete heater valve unit with the cable, sleeve and a water hose attached

This file is licensed under the Creative Commons Attribution-Share Alike 3.0 Unported license and is made available via Wikipedia by Larske

This file is licensed under the Creative Commons Attribution-Share Alike 3.0 Unported license and is made available via Wikipedia by Larske

A correctly functioning valve cuts off the water flow through the heat exchanger that’s in the bottom center of the front console, far forward, near the firewall, inside the passenger compartment.

On Volvo 240 cars, the internal fan that circulates cabin air is ALWAYS on (even in the fan-is-off position). And so, cabin air is constantly flowing past the heat exchanger. If hot water is also flowing through heat exchanger, this heats up the cabin air flowing by.

That’s why the heater valve is so critical. If it does not close, then hot water will flow, and the cabin air will be heated up.

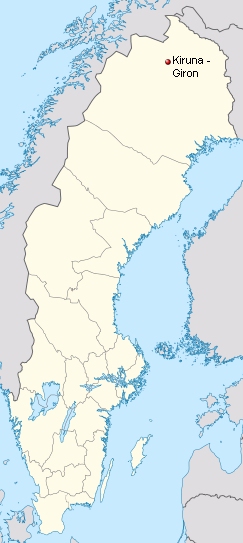
It’s typical of a Volvo that even when this part fails, it fails on the side of safety, meaning then you’re driving a car with the heater always on, instead of the heater always being off. Volvos are made in Sweden, and are popular in that market. Sweden gets bitterly cold in the winter.

Its northernmost city, Kiruna, is 90 miles north of the arctic circle, and in only 5 of the 12 months of the year is the average daily temperature above freezing. It’s been known to get as cold as minus 46 degrees there — and that’s without any wind chill factored in. So, if you lived there, would you want your Volvo heater to fail in an always-on or always-off position? Volvo engineers chose “always-on.”

Today, my assistant and I analyzed these three heater valves units in more detail.

The unit consists of:

      • A hot-water pipe with an inlet side and, at a right angle, an outlet side
      • A valve that closes the inlet side off from the outlet side to a total extent, zero extent or somewhere in between.
      • An internal riser that can move a short distance up or down, inside the hot-water pipe.
        • If its top edge protrudes as much as possible from the hot water pipe, then the valve is all the way closed.
        • If its top edge protrudes as little as possible from the hot water pipe, then the valve is all the way open.
        • And, an in-between position means a semi-open valve.
      • A mechanism that attaches to the heater control cable on the center console of the car. The cable performs both a “push” and a “pull” function.
        When the cable is pulled away from the valve, or pushed towards it, it pulls or pushes a lever that rotates a shaft. Attached to the lever is a spring, probably to help the “push” function along.

        • When the lever on the center console is moved to the right, then the cable is pulled away from the heater valve unit, and when that happens, the internal riser goes down, so that its top edge protrudes as little as possible from the hot water pipe, and then the valve is all the way open.
        • When the lever on the center console is moved to the left, then the cable is pushed towards the heater valve unit, and when that happens, the internal riser goes up, so that its top edge protrudes as much as possible from the hot water pipe, and then the valve is all the way closed.
      • An adjustment mechanism with a screw that has a Torx T15 head. Turning the screw in or out controls how far open or closed the valve is, relative to the position of the lever. Presumably this is intended to compensate for gradual wear in the valve, over the years.
      • A mechanism that provides a sealed copper tube with pressurized air inside. Proper name: capillary tube. This extends from the heater valve through a grommet into a small rectangular plate around which the tube is coiled maybe half a dozen times. The coil is intended to be in the direct path of the hot air flow from the heat exchanger towards the passenger compartment. When the flowing cabin air gets too hot, this mechanism basically cools things down again as a safety feature. Here’s how it works:
        • The hotter the flowing cabin air gets,
        • the more the copper coil heats up,
        • the more the air inside the coil heats up,
        • the more the air pressure inside the coil increases,
        • the more the air pressure pushes against the gray plunger in the unit,
        • the more the gray plunger extends from its brass tube,
        • the more the internal riser is pushed up,
        • the more its top edge protrudes from the hot water pipe,
        • the more the valve gets closed,
        • the more the hot water flow through the heat exchanger is reduced,
        • The colder the flowing cabin air gets.

Brilliant! And, it’s all mechanical — no electricity needed.

The internal mechanism with the gray plunger of the safety mechanism extending from its brass tube. The Torx adjustment screw is at the top center, just above the plunger, in this picture

The internal mechanism with the gray plunger of the safety mechanism extending from its brass tube. The Torx adjustment screw is at the top center, just above the plunger, in this picture

We had fun testing the safety mechanism by heating up the coil and observing how it closes the valve to some extent. We used a hair drier, very hot tap water, and some other ways that make a safety Nazi really mad.

My guess is that malfunctioning heater valves aren’t so much broken as they need their valve readjusted, so one twist of the Torx screw and you might have fixed the problem on your Volvo too. For some, it might be s worth trying. That way, you don’t have to deal with the messy job of removing and replacing the heater valve. Then again, perhaps the inside of the heater valve has deteriorated and the part really does need replacement.

If your Volvo 240 heater valve really, really is dead, and you want to keep it original, then yes, we do sell guaranteed used units.